Those adorable mini cheesecakes are made in a muffin tin! less difficult to make than one big cheesecake, they’re pretty as a photograph and lots much less messy to serve. Are you already visualising each person’s gushing reaction when you turn up at your next amassing with a platter of these petite treats??

Mini cheesecakes
On the subject of birthday celebration season, my dessert sport plan is quite predictable and heads in considered one of guidelines.
If i have the time and really need to make a dash, I’ll cross for a big declaration piece like the well-known Pavlova Christmas Tree or in no way-ending Meringue Tart, the latter aptly named due to the fact you could make it as impressively loooong as you need (four metres / 12 feet is my record to date!)
but once I recognise I’ll be pressed for time – and the vacation season this year may be this type of yr – I’m constantly questioning what i can prepare dinner up for publish-ceremonial dinner candies with a purpose to still make an effect however without the strain. My tick packing containers are for some thing low-threat, make-ahead, pretty, clean to transport and a assured crowd pleaser.
enter this yr’s dessert to the rescue: Mini Cheesecakes! They’re easier to make than one huge cheesecake (that are sort of fragile), with the convenience of side-stepping all of the hassles of cutting and dishing out with plates and cutlery. you could literally consume those together with your hands like cupcakes.
And they’re simply lovable!
What you need for mini cheesecakes
Right here’s what you need to make mini cheesecakes.
1. THE BISCUIT BASE
- Biscuits – My biscuit of preference for mini cheesecakes is digestive biscuits, for flavour and for the texture. those are a famous biscuit within the uk but also not unusual in Australian grocery stores these days. they’re company but have a crumbly texture so that they shape crumbs without difficulty, and are not as dry as different simple candy biscuits.
- replacement with:
– Graham crackers: Very comparable in both flavour and texture to Digestives.
– Arnott’s Marie crackers: i take advantage of these for large cheesecakes however i found the base a bit dry once I made those mini cheesecakes. however this is effortlessly countered with a few extra butter.
– any other undeniable sweet biscuits: simply make the biscuit base as written and upload a piece of extra butter if had to gain the “wet sand” texture you need. - Butter – to feature flavour and fat to the base, and as a binding so the biscuit crumbs coalesce into a strong base;
- Sugar – For a little more sweetness. We don’t want much.
- Cinnamon – non-compulsory, but I just like the greater touch of flavour it brings to the biscuit base.
- Salt – only a pinch.
2. THE CHEESECAKE FILLING
- The key to a creamy clean cheesecake filling is to make certain the bloodless substances are at room temperature.
- Cream cheese – The primary element in cheesecake! i’ve constantly used Philadelphia cream cheese which is the excellent regarded cream cheese brand. Use the block type not the creamy spreadable bath kind, which has a tendency to be softer.
- full fat cream cheese is vital here! Low fat cream cheese won’t set as properly and doesn’t have the identical flavour. It’s all in or make some thing else, I say!
- bitter cream – this might sound extraordinary however sour cream lightens the cheesecake filling so it’s not as dense. this is a “secret aspect” i take advantage of to make cheesecakes luscious however no longer overly rich.
- you could possibly get away with low fat but I haven’t tried it. simple yogurt also works alternatively.
- Sugar – It’s great to apply caster sugar / superfine sugar as the grains are smaller so they’ll dissolve extra effortlessly into the filling mixture. everyday sugar will work too but will require greater beating to dissolve. this indicates your mixture might be greater aerated as a way to lead to some floor bubbles on the cheesecake (now not the end of the sector although, as we cowl it with cream!).
- Flour – just a bit, to provide a chunk of stability to the filling and make it set. without this, the filling units a chunk too flabby and unfastened.
- Eggs – that is our binding agent for the filling that holds everything together. Eggs, the closing meals glue!
- ensure the eggs are at room temperature and no longer refrigerator-bloodless. This manner they may include more without difficulty into the batter and you gained’t run the danger of curdling the combination. Yup, been there, performed that! To quickly carry eggs to room temperature, just submerge in heat water for 5 mins.
- Vanilla – For flavour. i like to use extract rather than imitation essence which is, properly, fake. I don’t use real vanilla beans for standard baking. I reserve that top stuff for special things like Creme Brûlée, Creme Anglaise (pouring custard).
- Salt – It’s normally proper baking exercise to add a bit of salt to most dishes to deliver out the flavor of other ingredients. it’ll now not make this taste salty.
- Lemon zest – constantly welcome in wealthy things, it brings a hint of brightness to offset a number of the creaminess. It doesn’t make this flavor like a lemon cheesecake. You want quite a few zest for a mentioned lemon flavour in cheesecakes, as i discovered out when creating Lemon Cheesecake for my cookbook!
How to make Mini Cheesecakes
Quality and straightforward. and that i genuinely like that you may make these cheesecake days in advance! Don’t worry if you don’t have a meals processor or electric beater, there’s different way to make this.
1. BASE
- Blitz – place the biscuits in a food processor and blitz until they grow to be quality crumbs. It takes approximately 10 seconds in my food processor. start by pulsing then blitz on high until done. Then add the entirety else (melted butter, cinnamon, sugar, salt) and blitz once more in brief to mix.
- Don’t have a meals processor? No issues. simply placed the biscuits in a ziplock bag and bash the use of a rolling pin or massive tin. It’s very gratifying!
- moist sand texture – The mixture should look like moist sand and holds collectively whilst you pinch it between your hands. Divide the mixture between paper muffin tin liners sitting in every hole.
- Press and flatten the crumbs firmly into the bottom of every hollow the usage of some thing spherical with a flat base. A 1/4 cup degree is the ideal device for me.
- Bake for 7 minutes then eliminate and cool for 5 minutes earlier than topping with the cheesecake filling.
2. CHEESECAKE FILLING
The intention with the filling is to make it as easy as you can but beating as little feasible. this could minimise the amount of air bubbles within the combination so that you don’t become with bubbles or cracks on the surface.
I expect you’ve discovered that this additionally way the filling is fast to make!
Beat – begin with the aid of beating the cream cheese till clean. If it’s properly at room temperature, this have to slightly take 10 seconds on a medium pace. Then beat in the whole thing else except the eggs, just until smooth.
- Don’t have an electric beater? simply ensure the cream cheese is quite tender then just use a hand held whisk / wood spoon. it really works because we aren’t trying to fluff up the cream cheese like we do with butter for such things as buttercream frosting. All we want is to make the cream cheese smooth.
- Eggs – Beat the eggs in one at a time, simply till incorporated.
- Batter thickness – The cheesecake filling have to be extra like a thick pancake batter, rather than a muffin aggregate that can be scooped into mounds.
- Divide the combination between the muffin tin holes. Use it all! you can fill the holes up to 3 mm from the rim because the cheesecake does now not upward thrust a whole lot.
- i like to use an ice cream scoop with a lever. It’s very available for truffles, cupcakes, pancakes, fritters …. AND ice cream!
- Bake for 20 minutes at one hundred sixty°C / 325°F (one hundred forty°C fan). A decrease temperature avoids browning at the surface while lightly baking the sensitive cheesecake filling.
- once baked, the filling ought to still be tender and supple inside the centre, not rock tough. but no longer jiggling like there’s liquid underneath. If it’s too soft, pop it again within the oven for a couple of minutes.
- Cool very well on the counter for as a minimum 1 hour.
- refrigerator – cowl the floor with a sheet of baking/parchment paper then seal with grasp wrap. place in the refrigerator for as a minimum 6 hours to completely set, ideally in a single day.
3. DECORATING!
- Completely set – once the mini cheesecakes are thoroughly chilled they’ll be set sufficient to pick up.
- Peel off the paper liner and location on a serving platter.
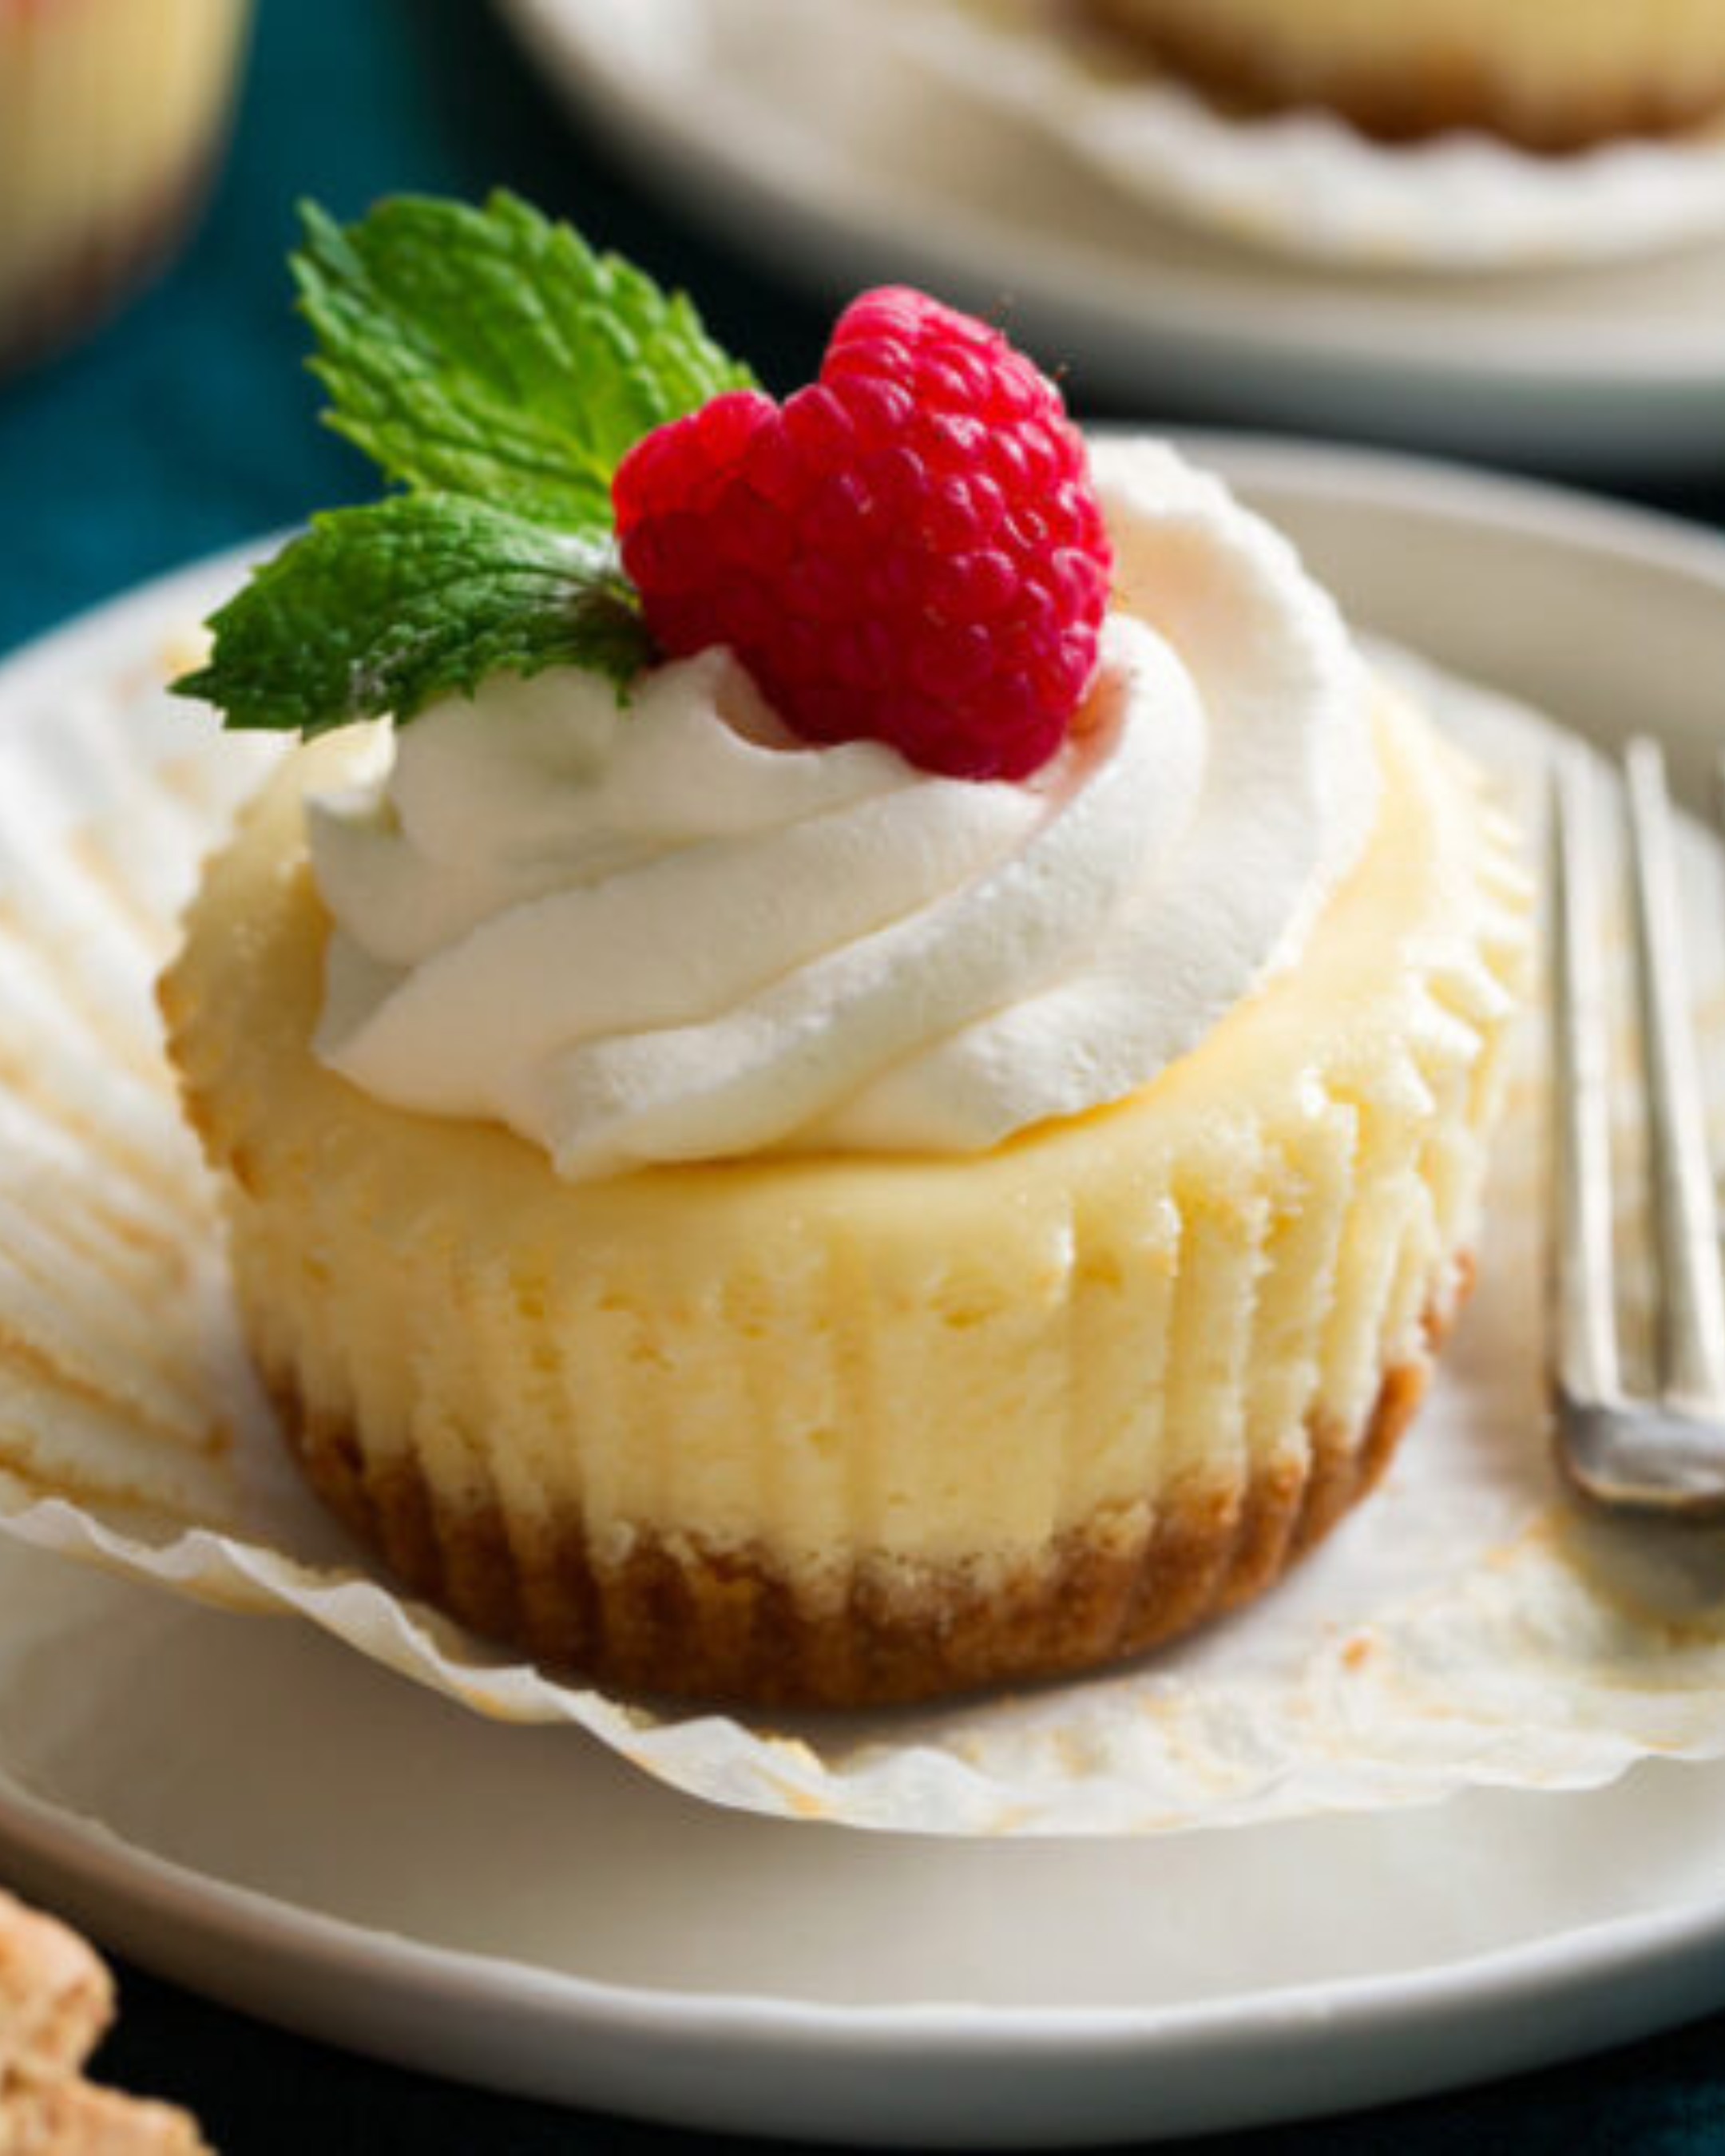
- Cream – decorate as you wish! In nowadays’s recipe I’ve long gone with Chantilly cream (which is simply a fancy name for lightly-sweetened whipped cream) and berries. I’ve piped the cream on using a star tip nozzle but you may additionally simply dollop the cream on the usage of spoons.
- Berries – I used small strawberries (halved / quartered), raspberries and blueberries plus a small sprig of mint, all dusted with icing sugar.
The practical stuff: Storage and serving tips
The making element done, i have some practical suggestions to percentage with you on serving, garage and assembling so you pull off your dessert without a hitch on birthday party day! In no unique order:
- storage – hold them within the fridge. They’re first-rate for 24 hours after making, and nevertheless very, very good at 48 hours. beyond this the bottom starts offevolved getting softer than is right however no person complains. If wished it maintains for 5 days as a minimum, probably longer. however note the cream will begin to deflate after round 24 hours. See tips underneath for assembling and stabilised cream.
- Freezing – The naked cheesecake (ie. no cream) can be frozen for up to a few months then thawed.
- Serve at room temperature – preferably. Cheesecake is creamier and you can taste greater flavours while it’s at room temperature. though on hot summer days cold cheesecake from the refrigerator is lovable! In my ideal state of affairs, I de-sit back the cheesecake for half-hour to 1 hour, then I beautify just previous to serving.
The practical stuff (continued)
- Redecorating – normal freshly whipped cream deflates with time so try to collect as close to serving as you can. once I really need to electrify, I take the Chantilly cream components and system with me and whip the cream close to serving.
- If I’m feeling more comfy, I’ll simply beautify the cheesecakes previous to leaving my residence and put it immediately inside the fridge after I arrive,. they’re first-class for some hours. The cream will deflate a chunk however in case you whip until stiff it will maintain its piped shape for a day.
- Stabilised cream – For the best make-ahead results, use a stabilised cream. To do this, switch 1/four of the (unwhipped) whipping cream with marscapone cheese, a rich Italian soft cheese that tastes like whipped cream however has the feel of spreadable cream cheese.
- when you whip marscapone with ordinary cream, the ensuing cream remains mild and fluffy for a long way longer than plain whipped cream, ie. it’s miles “stabilised”. it’ll remain fluffy and close to-best for twenty-four to 36 hours. beyond this, it begins to deflate slightly but continues to be a ways superior to plain whipped cream!
- And with that, it’s over and out for me!
- Time at hand over to you. What do you observed of the cheesecake? is this holiday gatherings-worth? what is going to you beautify yours with? inform me under, I want to recognize!